BenzUnited Parts
792 9792 Palladium Silver Metallic Mercedes Touch Up Paint & Repair Kit
792 9792 Palladium Silver Metallic Mercedes Touch Up Paint & Repair Kit
Couldn't load pickup availability
Mercedes-Benz Palladium Silver Metallic Touch-Up Paint – 792 / 9792
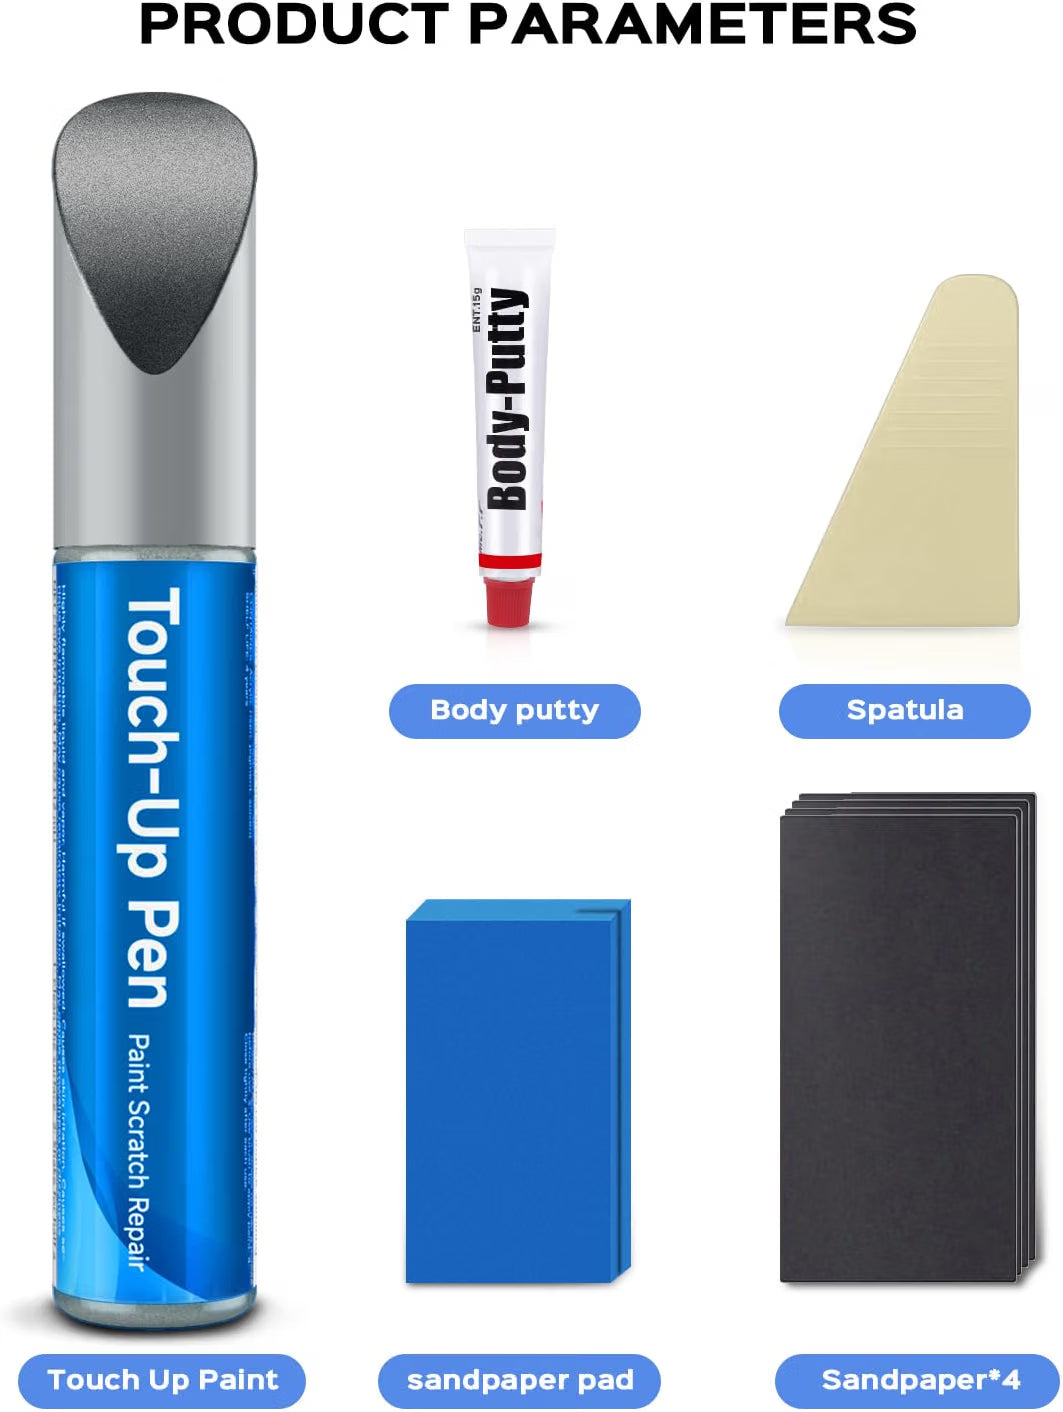
Palladium Silver is Mercedes-Benz paint code 792, also written 9792, a metallic silver used widely across the range. Each bottle holds 0.41 fl oz of exact-match paint for rock chips, door-edge scratches and small blemishes. Choose the paint on its own, or the complete repair kit — the kit adds body putty, a spatula, a sanding pad and four sheets of sandpaper, and gives a flatter, cleaner result than paint alone.
Confirm Your Paint Code First
The paint code is printed on a sticker, most often on the driver-side door jamb, and on many cars also under the hood. This paint is Palladium Silver — the sticker should read 792 or 9792. German paperwork and service records write the same colour as Palladiumsilber.
This is the silver people most often assume they have, because Mercedes put it on so many cars. Assuming is the expensive part. Mercedes sold several silvers and greys alongside each other, each with its own code and its own paint, and none of them is automatic just because a car is silver.
On a metallic, flake size, density and orientation all differ from one code to the next — so two silvers that look identical in a garage will flash differently in direct sun, and the repair catches light at an angle the panel around it does not. That is what gives a near-miss away, and no amount of careful application fixes it. Thirty seconds at the door jamb beats a repair you have to sand back off.
What’s Included
Paint Only
- 1 × Palladium Silver 792 / 9792 touch-up paint, 0.41 fl oz
Complete Repair Kit — recommended
- 1 × Palladium Silver 792 / 9792 touch-up paint, 0.41 fl oz
- 1 × body putty
- 1 × application spatula
- 1 × sanding pad
- 4 × sandpaper sheets
Paint covers the damage. Prepping and levelling first is what makes the repair disappear instead of sitting proud of the panel. For the best finish, take the kit.
Specifications
| Paint code | 792 / 9792 |
| Color name | Palladium Silver — Palladiumsilber in German |
| Finish | Metallic |
| Volume | 0.41 fl oz — same in both options |
| Contents | Color coat only — no clearcoat included |
| Applicator | Twist-cap bottle with fine brush |
| Vehicle make | Mercedes-Benz |
Which Mercedes Use Palladium Silver
792 is one of the most widely used colours Mercedes has offered — sedans, coupes, wagons and the SUV line — rather than a colour tied to one chassis or one era.
Which is why a model list would not narrow anything down for you. A very large share of the lineup was available in this colour, and most cars of any given model left the factory in something else. Your door jamb sticker is the only thing that settles it.
How to Apply
With the paint alone
- Wash and dry the area. Car soap and water, rinsed, then dried completely. Paint will not bond through road film.
- Clean inside the chip. Wipe it with isopropyl alcohol or a wax and grease remover on a lint-free cloth. Wax and polish collect in the bottom of a chip where washing never reaches, and that residue is the most common reason a touch-up lifts months later. Let the solvent flash off completely before going further.
- Pick away loose edges. If paint is flaking around the rim, lift it with a toothpick. Paint over a loose edge and the repair fails at that edge.
- Shake until you hear the mixing ball move. Thirty seconds is usually enough, and on a metallic it matters more than on a solid — the flake settles, and an under-shaken bottle lays down colour without it. Then twist the cap open and work the first paint out onto a piece of card until the brush flows evenly. Never load the brush over the car, the first stroke usually floods.
- Dab, don’t drag. Touch the brush to the centre of the chip and let the paint flow outward on its own. Dragging it like a marker leaves ridges, pulls colour onto the good paint around the chip, and combs the flake into lines that catch the light. On very small chips, transfer a bead onto a toothpick and place it instead.
- Build thin layers, stopping just below flush. Several thin coats beat one thick one. Finish a fraction below the surrounding surface rather than above it — a shallow dip catches far less light than a raised blob, and the blob is what makes a repair obvious from ten feet away.
- Leave at least 4 hours between coats.
Work in shade on a cool panel, ideally between 50°F and 90°F and out of direct sun. Hot metal flashes the solvent off too fast and leaves a rough, textured edge.
With the complete kit — for the best finish
- Wash and dry the area, then clean it with isopropyl alcohol or wax and grease remover.
- Sand the damage back with the coarser sandpaper to remove loose paint and feather the edges.
- Press body putty into the low spot with the spatula rather than piling it on top. Let it set.
- Sand level, finishing with the pad so the repair sits flush. Check by running a fingertip across it — your finger finds a step your eye misses.
- Clean the area again and let it dry completely.
- Shake until you hear the mixing ball move, work the brush out on card, then dab colour into the repair in thin coats.
- Leave at least 4 hours between coats.
Drying & Curing
- Touch dry in roughly 30 minutes
- At least 4 hours between coats
- Leave 24 hours before washing the car
- No wax, polish or automatic car wash for about 30 days while the paint hardens fully
Typical for solvent-based touch-up paint. Cold or humid conditions extend all of it.
Shipping & Returns
- Free shipping.
- Ships within 1 business day.
- 30-day returns on unused, unopened items.